To keep your vehicle’s new-car finish, you must consider all aspects of vehicle exterior protection. However, painting a car is not an inexpensive process. Unfortunately, many automobile owners have no idea how to preserve car paint. The good news is that you don’t need to be an expert or get heavyweight car accessories to do this well.
You probably are more of a car owner than a car lover if your concept of vehicle exterior protection is a short trip through the neighbourhood car wash and then stuffing four quarters into an industrial vacuum or just use car body covers. Fear not; the professionals are here to explain the fundamental detailed steps involved in a skilled automobile exterior cleaning service.
The Four Fundamental Detailing Steps
There are four basic tasks involved in exterior detailing. The prep wash of the exterior is the first step in fundamental detailing operations. By doing this, you can get rid of loose pollutants like dirt and dust. To make the car’s surface look fantastic, paint cleaning and renewal follow next.
The final step involves coating the paint surface with protection to keep it looking excellent. The last step is to detail other exterior surfaces.
Before Beginning
Check the outside of the vehicle thoroughly before starting the process of vehicle exterior protection. Look for scrapes, scuffs, and extra foreign material, such as tar and road markings, that has settled on the bumpers, spoilers, and rocker panels.
Make a list of the additional items you need to buy after checking the supplies you already have. Depending on the state of your car’s finish, you’ll require different things. You might need to mobilise the heavy artillery if your vehicle hasn’t received recent waxing or has a neglected finish.
Here are some basic detailing strategies to get the paint on your car back to a showroom shine when you’re ready to take on the project.
- Ready Wash
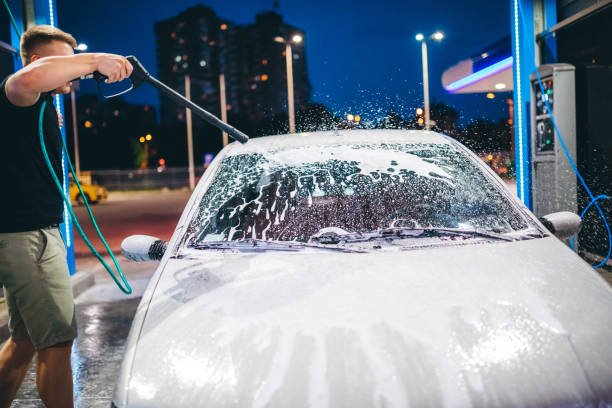
Carry out the prep wash first. The prep wash aims to clean the car of loose dirt, dust, or debris. Using more abrasive cleaning agents during the preliminary wash is acceptable because the vehicle will receive exterior vehicle protection and waxing afterwards.
Always start washing from the top and then follow down. You may also include wheels and wheel wells in this process. Keeping your paint’s wax or sealant clean will help it last longer. It would be best if you ideally looked for weekly completion of this stage.
- Claying
During the prep-wash phase, some professionals favour using detailer’s clay. If doing so, wash and thoroughly rinse the car first. Then clay the car, lubricating the clay with a fresh batch of car wash shampoo—finally, clean and completely dry the vehicle. For cars with little surface contamination, the experts advise using detailer’s clay during the preliminary wash.
The benefit of claying after drying the vehicle is that you may be more thorough and monitor your progress as you work the clay into the vehicle’s surface. The surface should feel substantially smoother after claying the car. Fold and flatten the clay occasionally to reveal a spotless character.
One critical warning: Don’t let the clay fall. Dropping the clay makes it ineffective since it will pick up dirt that could harm the automobile.
- Polish
Next, carry out any necessary measures for polishing. Polishing paint aims to make the paint’s surface sparkle and erase minor subsurface damage. A natural polish won’t provide any further paint surface protection; waxing is necessary.
The professionals will smoothen, clarify and clean your car’s surface with polish. You can remove minor scratches by polishing, but be careful to apply light pressure. This is because polishing can also damage the paint. The experts advise you to repeat this process once or twice a year.
- Protection
When you have restored the car’s paint to your satisfaction, it’s time to cover that new paint surface with wax or paint sealer. The average protective time of a high-quality wax is three to six months. Polymer paint sealants typically offer six to twelve months of protection.
This process adds gloss and moisture to the paint while protecting it from damage. Work on a tiny section at a time, putting wax directly on the applicator rather than the car. You should ideally perform this process every 2 to 6 months.
- The Last Details
The last step in the fundamental vehicle exterior protection is to spend some time on any other outside surfaces that could require care. Consider polishing the chrome trim. Or you can spray wax on and clean the doorjambs and wheels. And don’t forget to thoroughly clean and wipe the windows, so they are streak-free.
In Summary
Maintaining the vehicle exterior protection on your car shouldn’t be as difficult as some claim. An automobile that you buy comes with a lot of duties. You must invest some time and energy in the maintenance of your car. You may find out more by visiting Carorbis online today.